Access Path
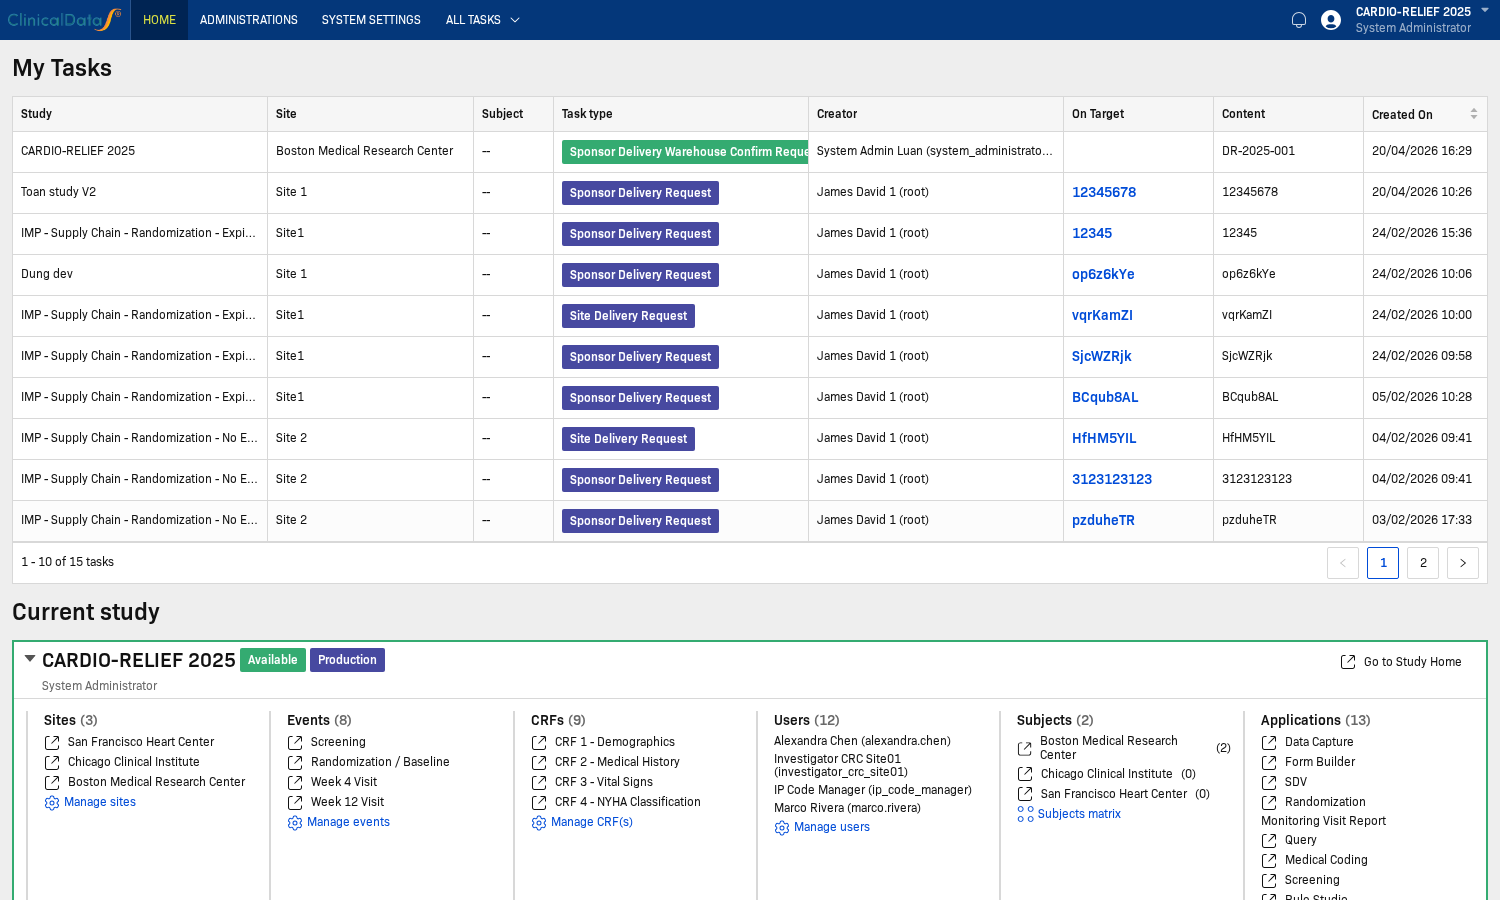
- From the My Tasks page, identify the study you are working on in the Current study area.
- Open the Study Overview for your study.
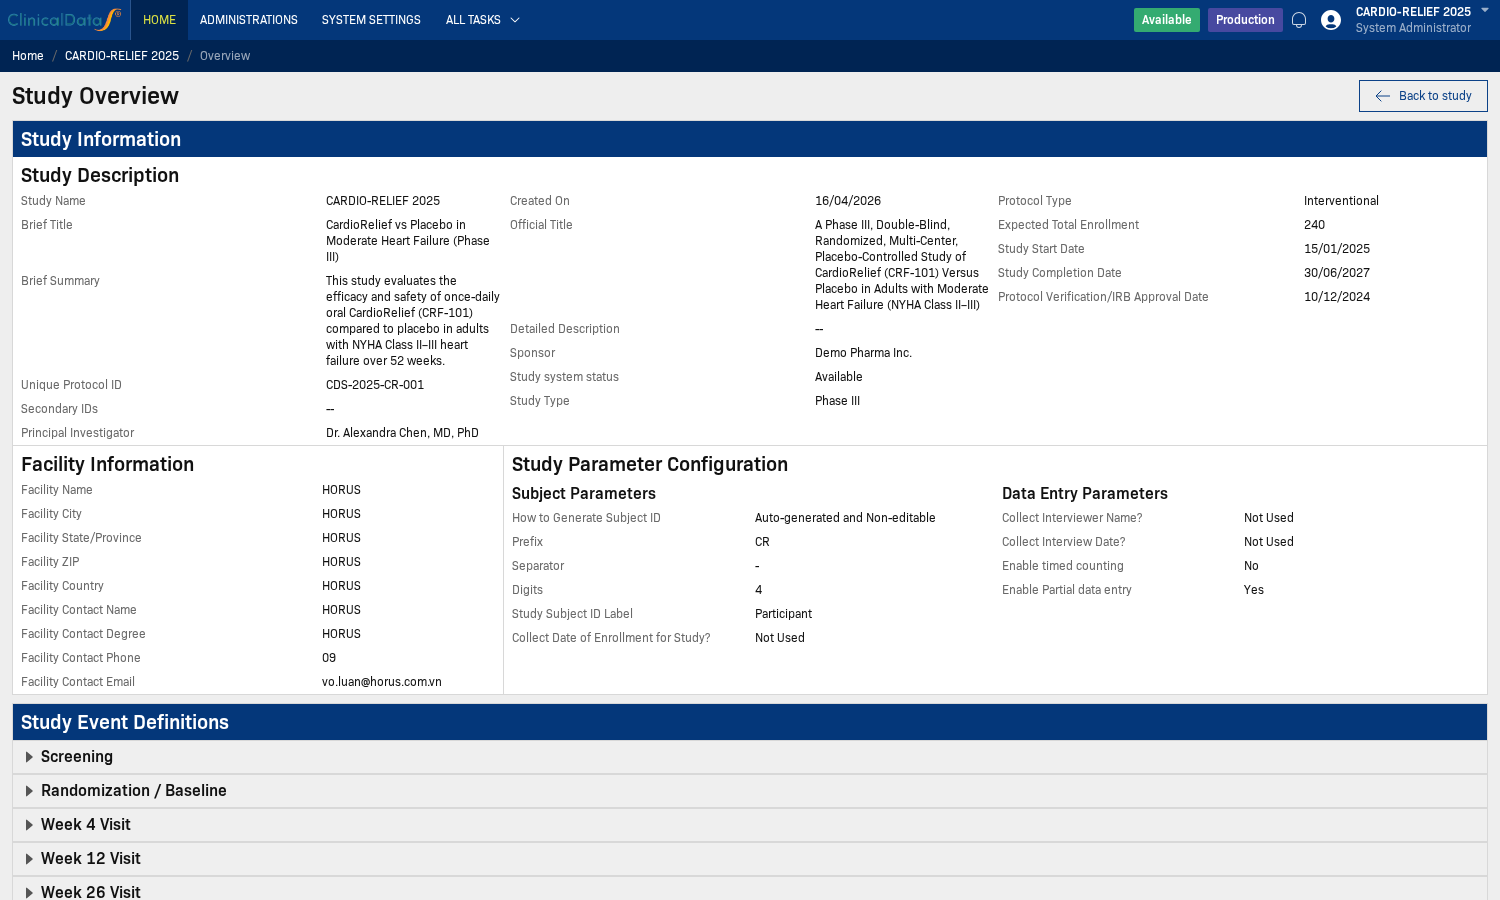
- Access the Pre-Screening and eConsent application from the Applications menu.
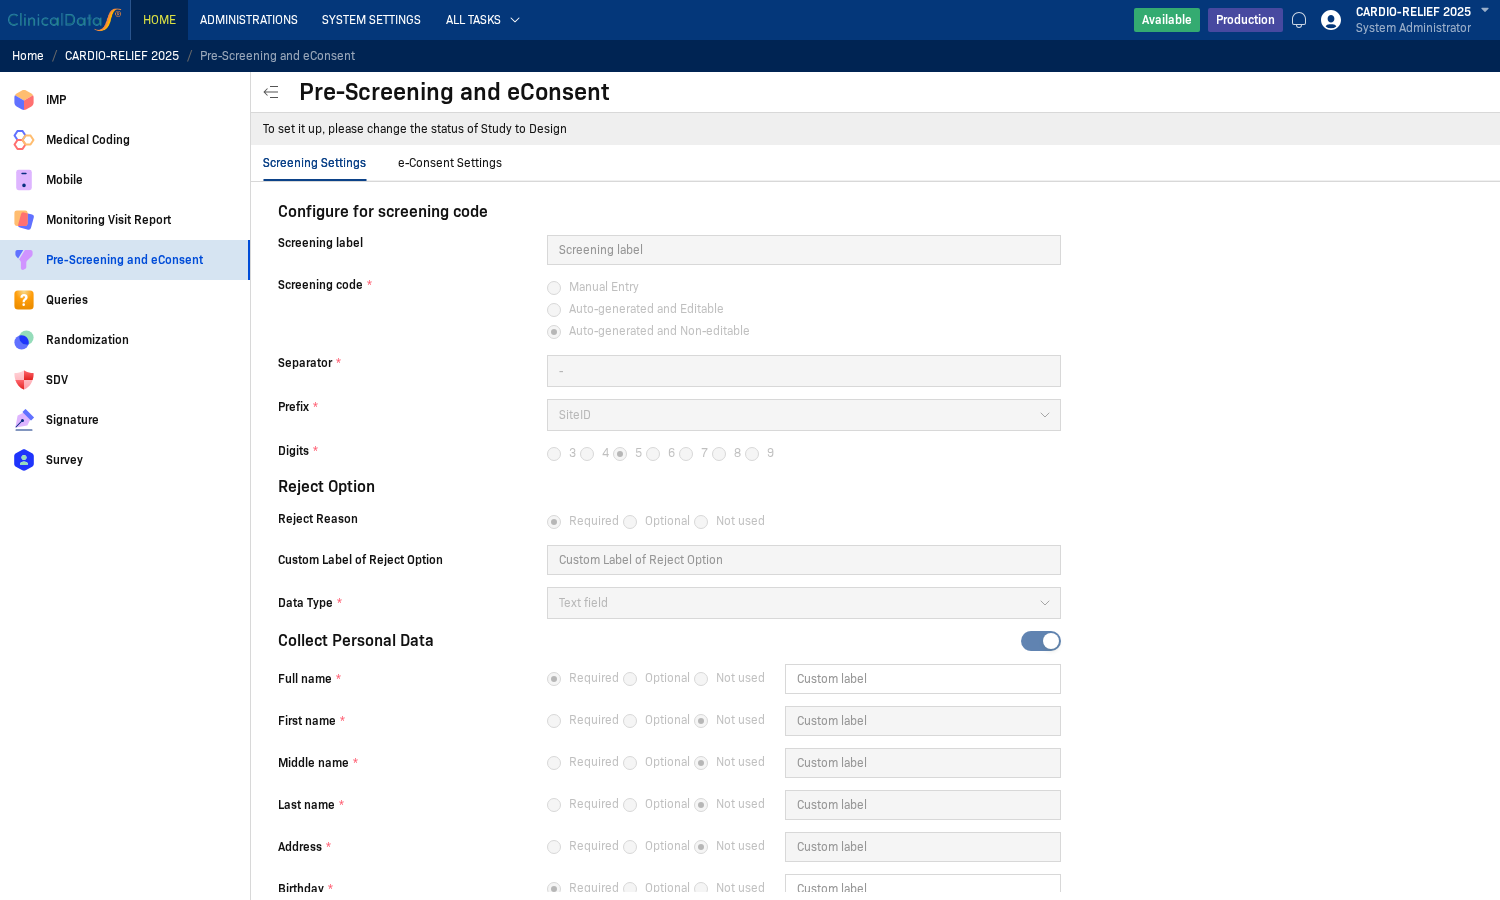
- Switch to the e-Consent Setup tab.
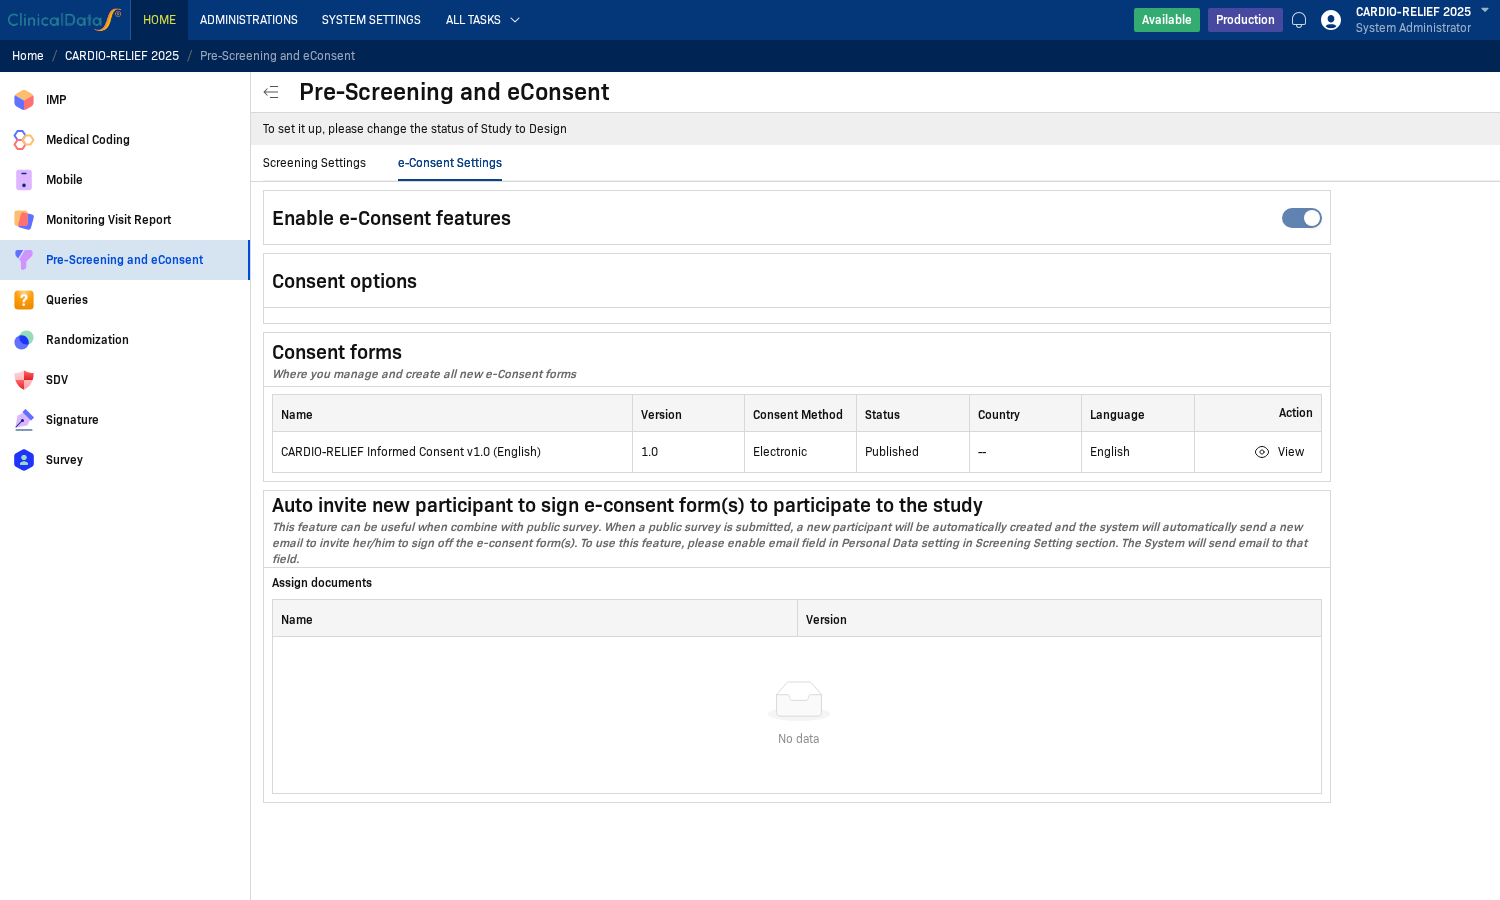
If the study is in Available or Frozen status, the system displays the message "To set it up, please change the status of Study to Design" and fields will be read-only.
e-Consent Configuration Components
1) Enable e-Consent Features and Consent Forms
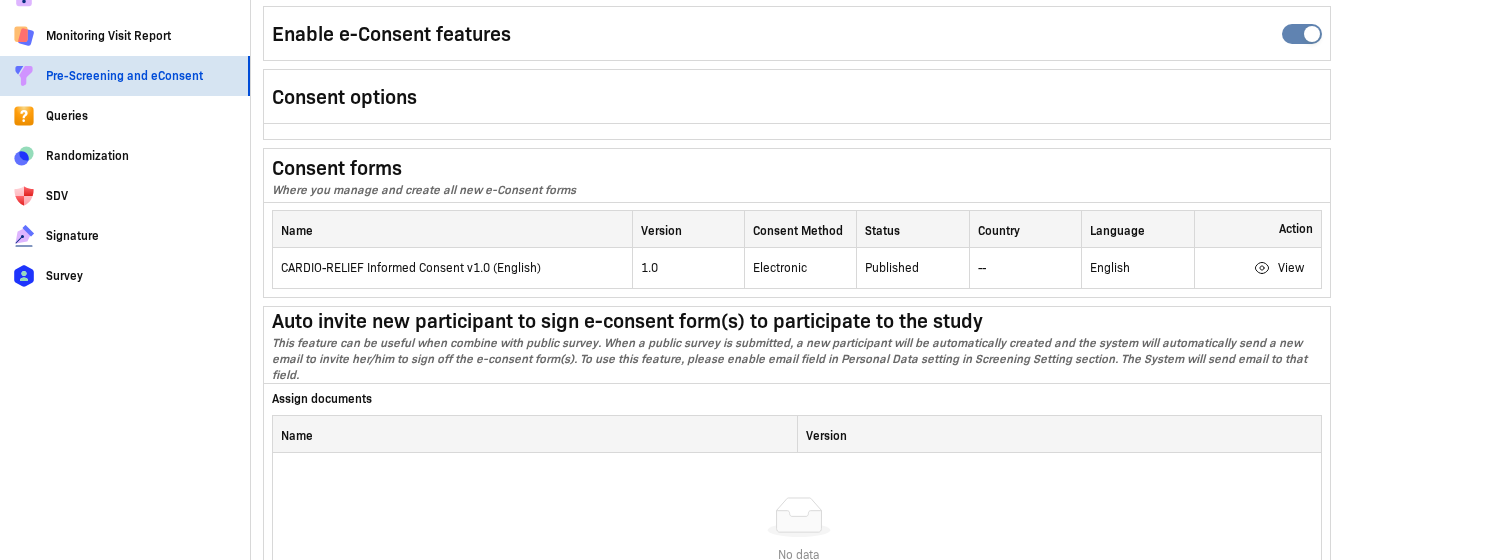
When you enable the e-Consent features toggle, the following main areas appear:
- Consent options: Configure e-Consent behavior and related settings
- Consent forms: Manage the list of consent forms
- Auto invite: Automatically send signing invitations to new participants
2) Consent Forms and Form Status
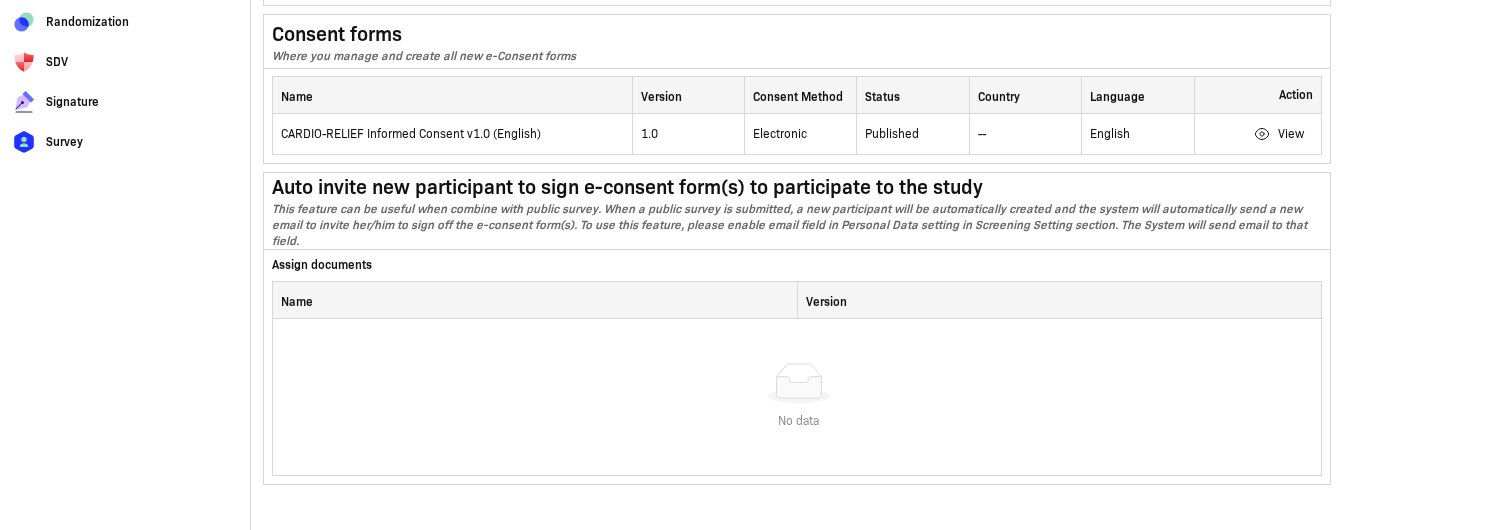
In the Consent forms table, each row represents a version of a form with the following key columns:
| Column | Meaning |
|---|---|
| Name | Name of the consent form |
| Version | Version of the form |
| Consent Method | Signing method (e.g., Electronic) |
| Status | Form status (Draft, Published, Archived) |
| Country | Country scope (if applicable) |
| Language | Language of the form |
| Action | Actions such as View, Edit, Publish |
3) Auto Invite
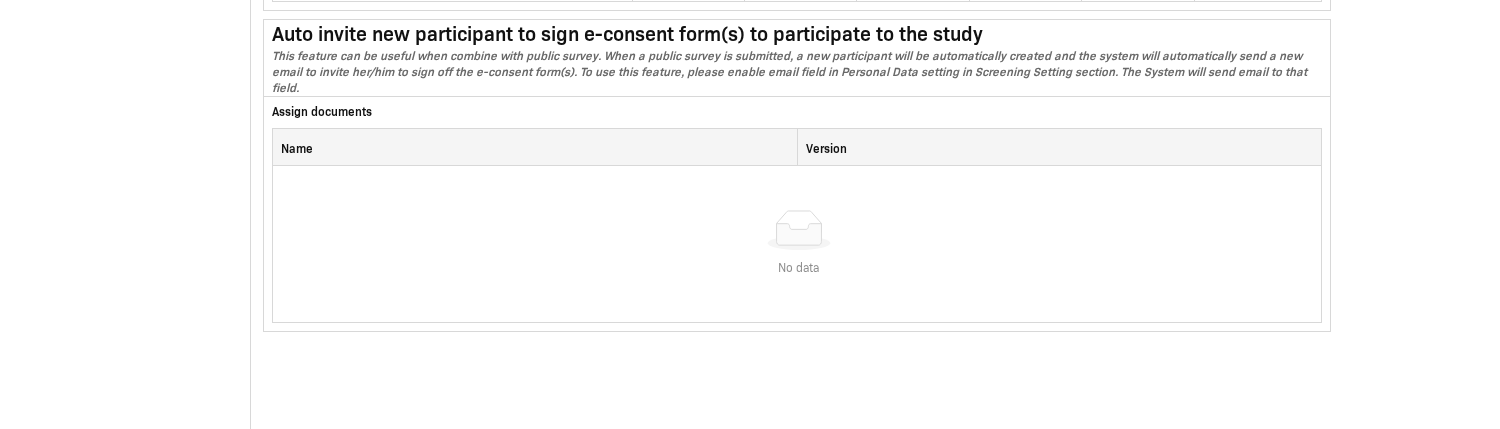
The Auto invite section is used to automatically send e-Consent signing invitations to new participants when configured conditions are met.
Operational notes:
- Email must be enabled in the Collect Personal Data section of Screening Setup.
- At least one consent form must be in Published status for participants to be able to sign.
How to Sign e-Consent Step-by-Step
Step 1: Open the Screening List
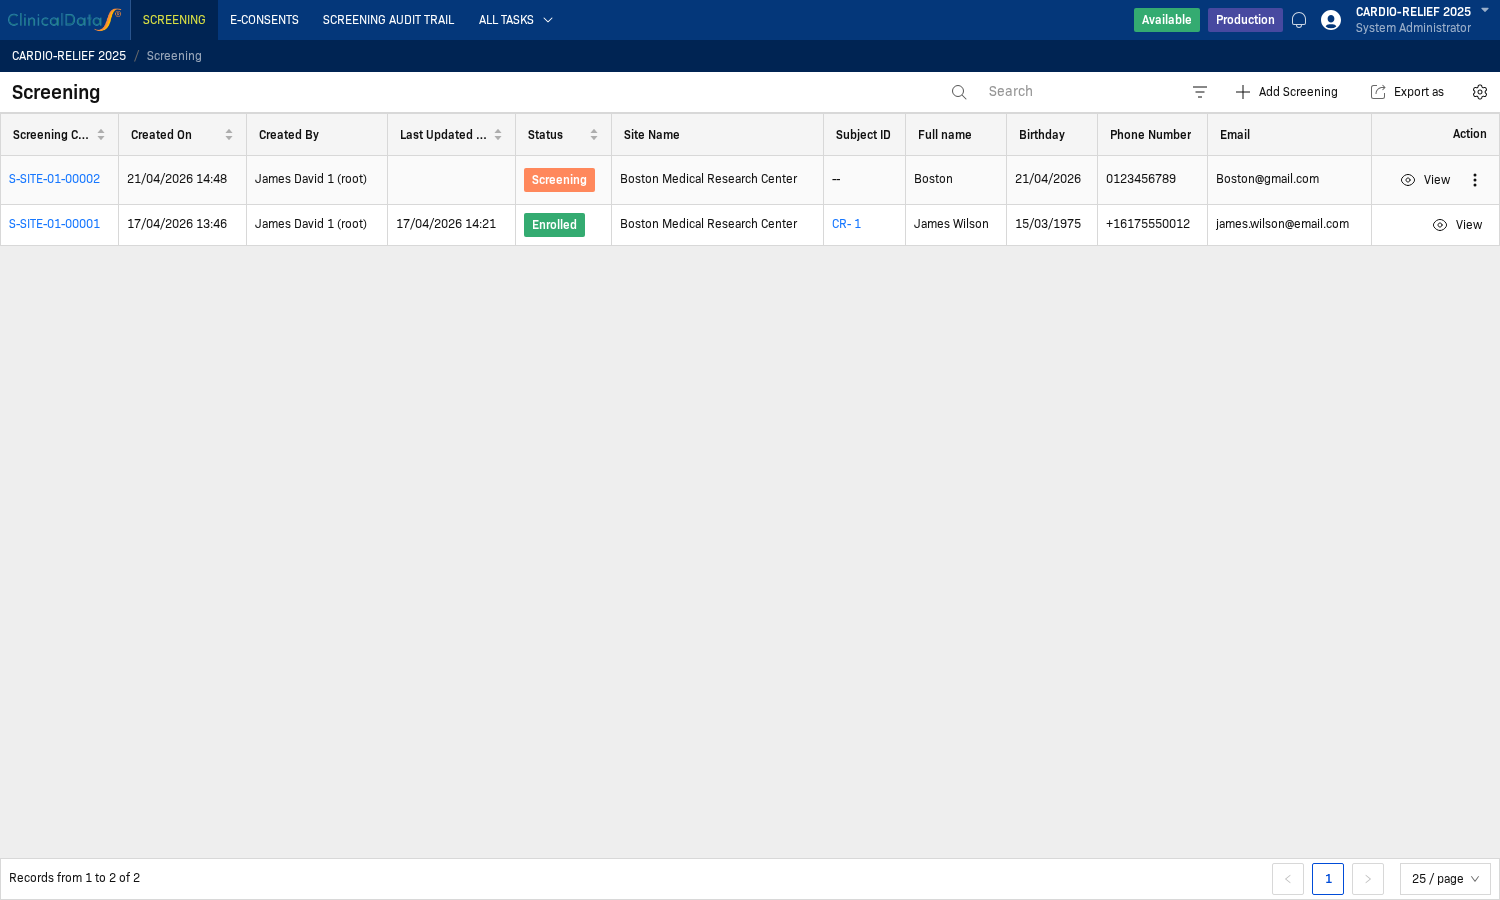
Select the appropriate participant and open their detailed record.
Step 2: Check Consent Information in the Participant Record
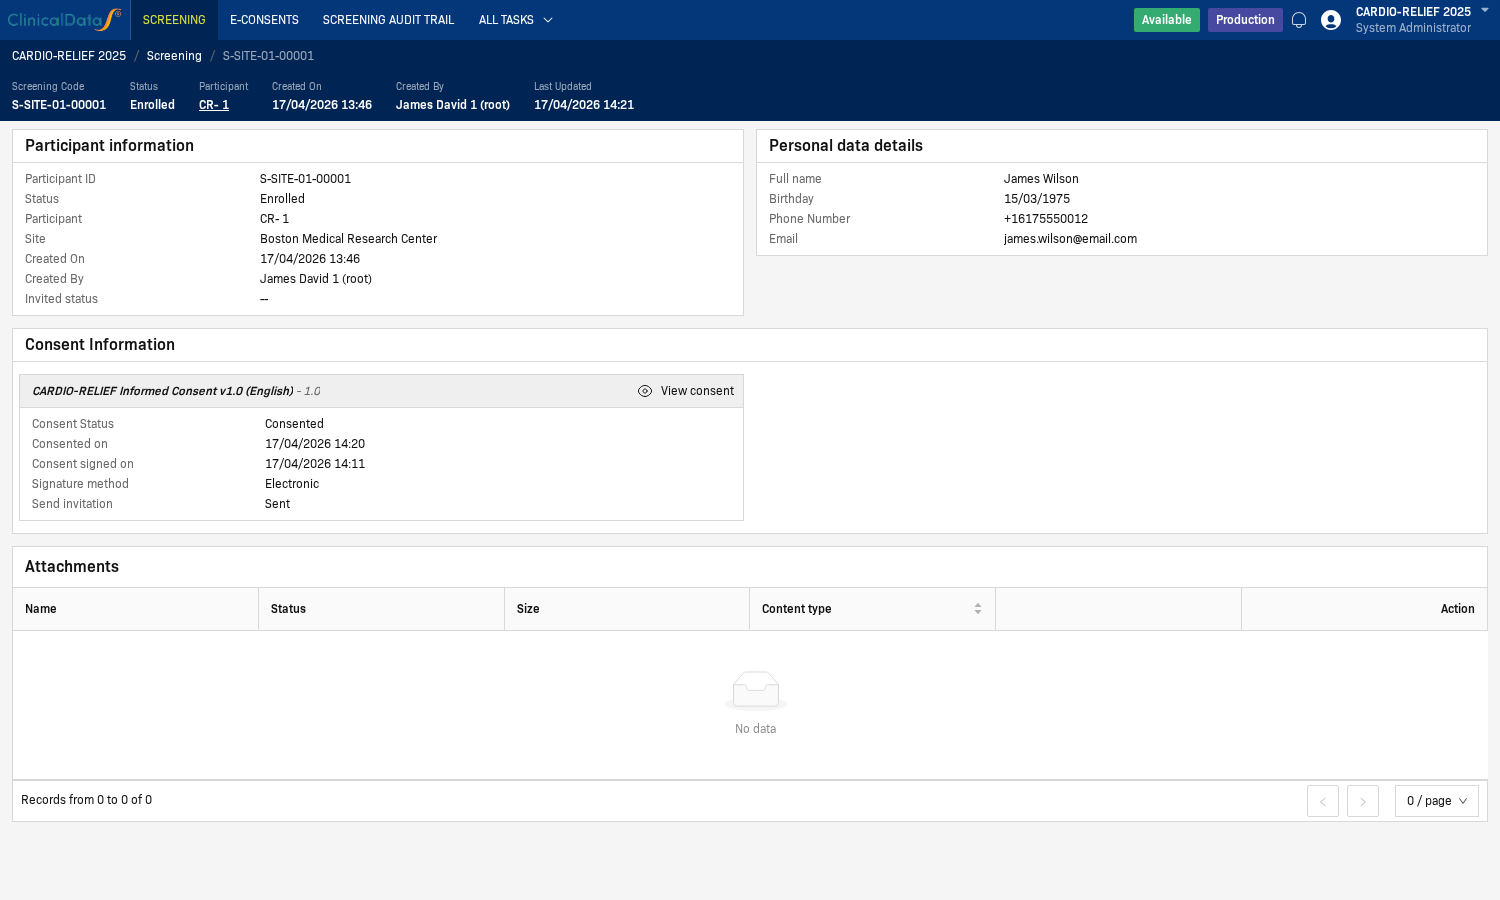
In the Consent Information section, click View consent to open the form that needs to be signed.
Step 3: Open the Consent Form
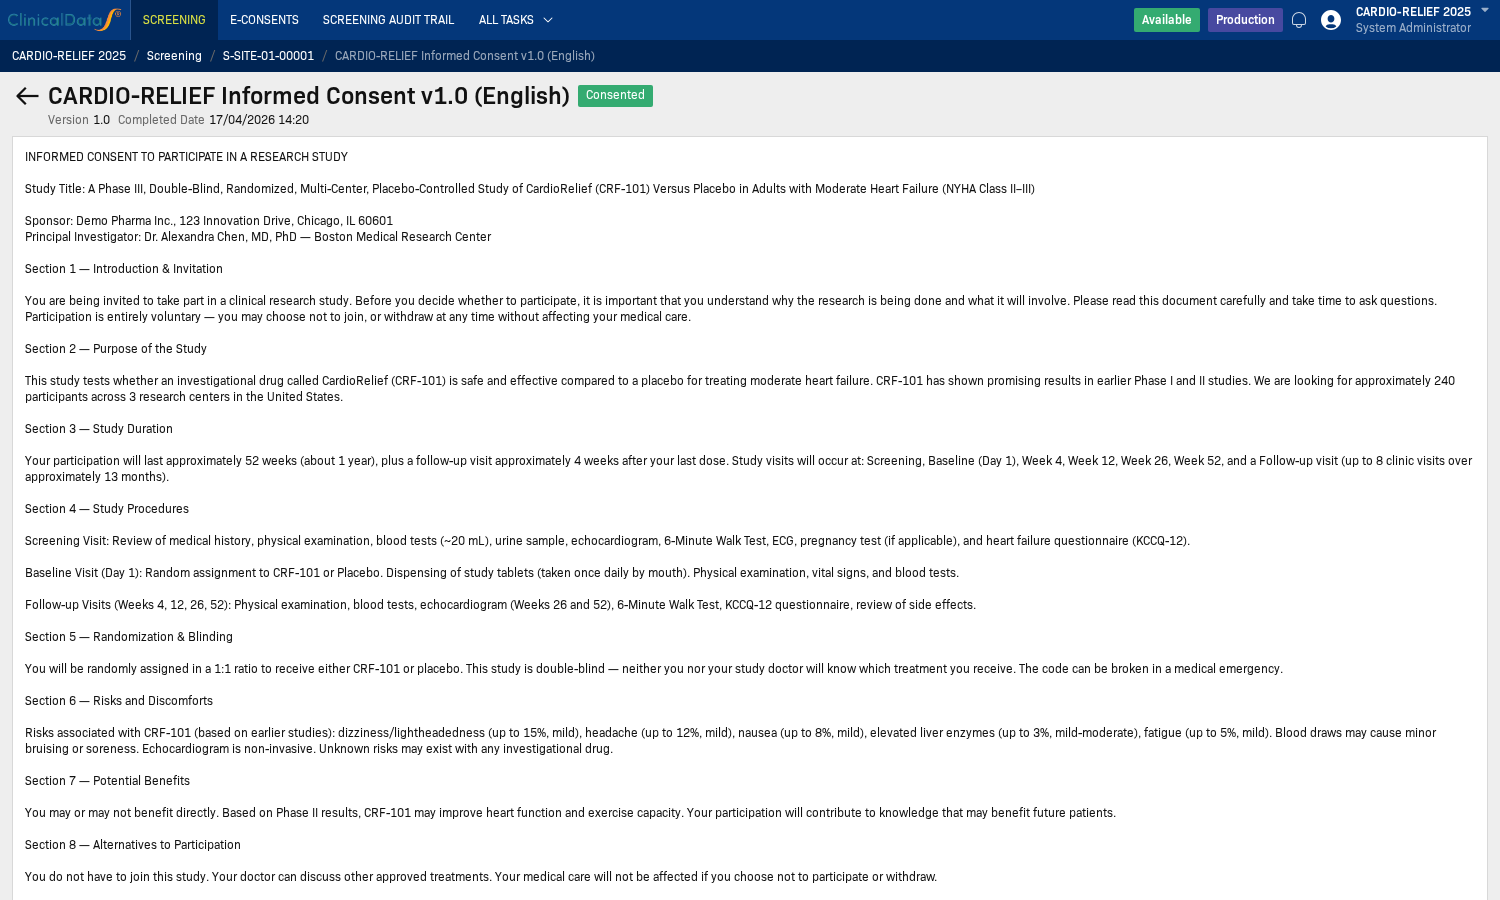
Review the form content before proceeding with the signing process.
Step 4: Fill in Signature Information
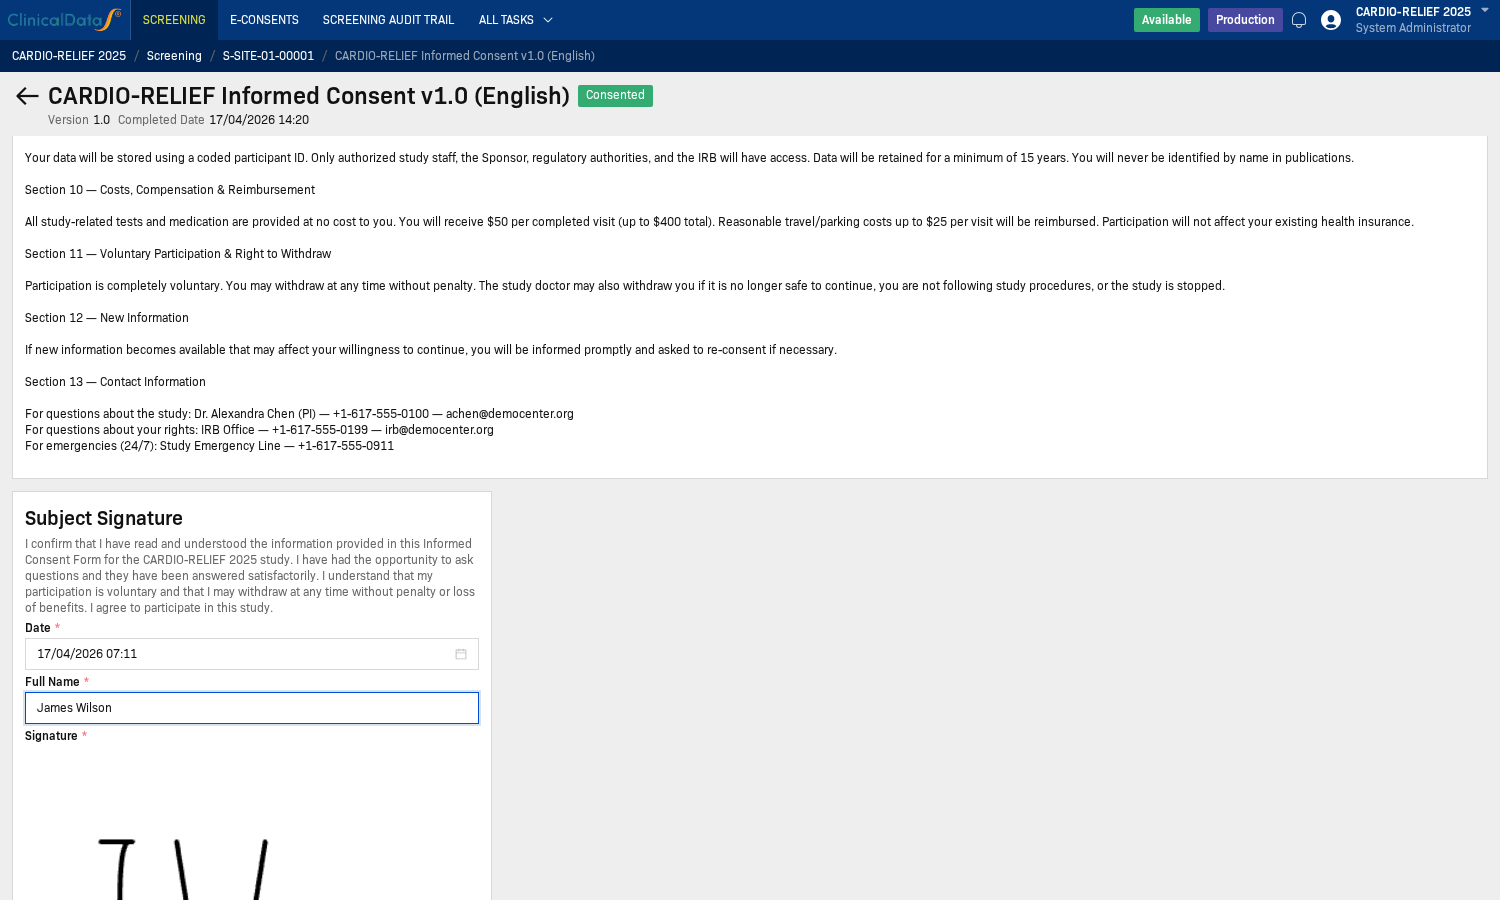
Complete all required fields in the Subject Signature area.
Step 5: Sign in the Signature Area
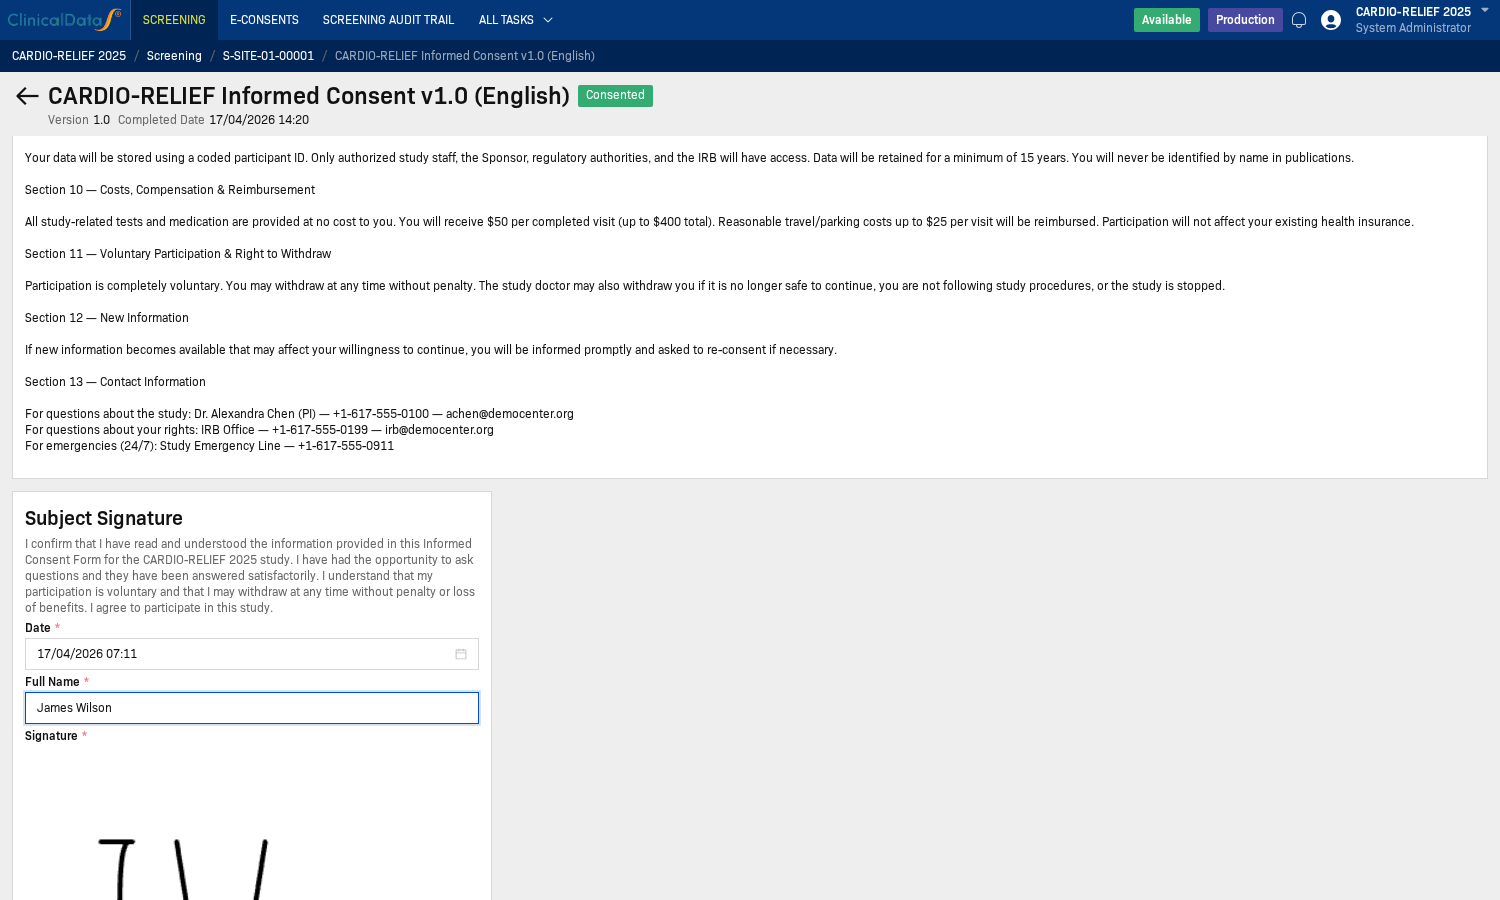
Sign directly on the signature canvas according to your study's procedures.
Step 6: Confirm Consented Status
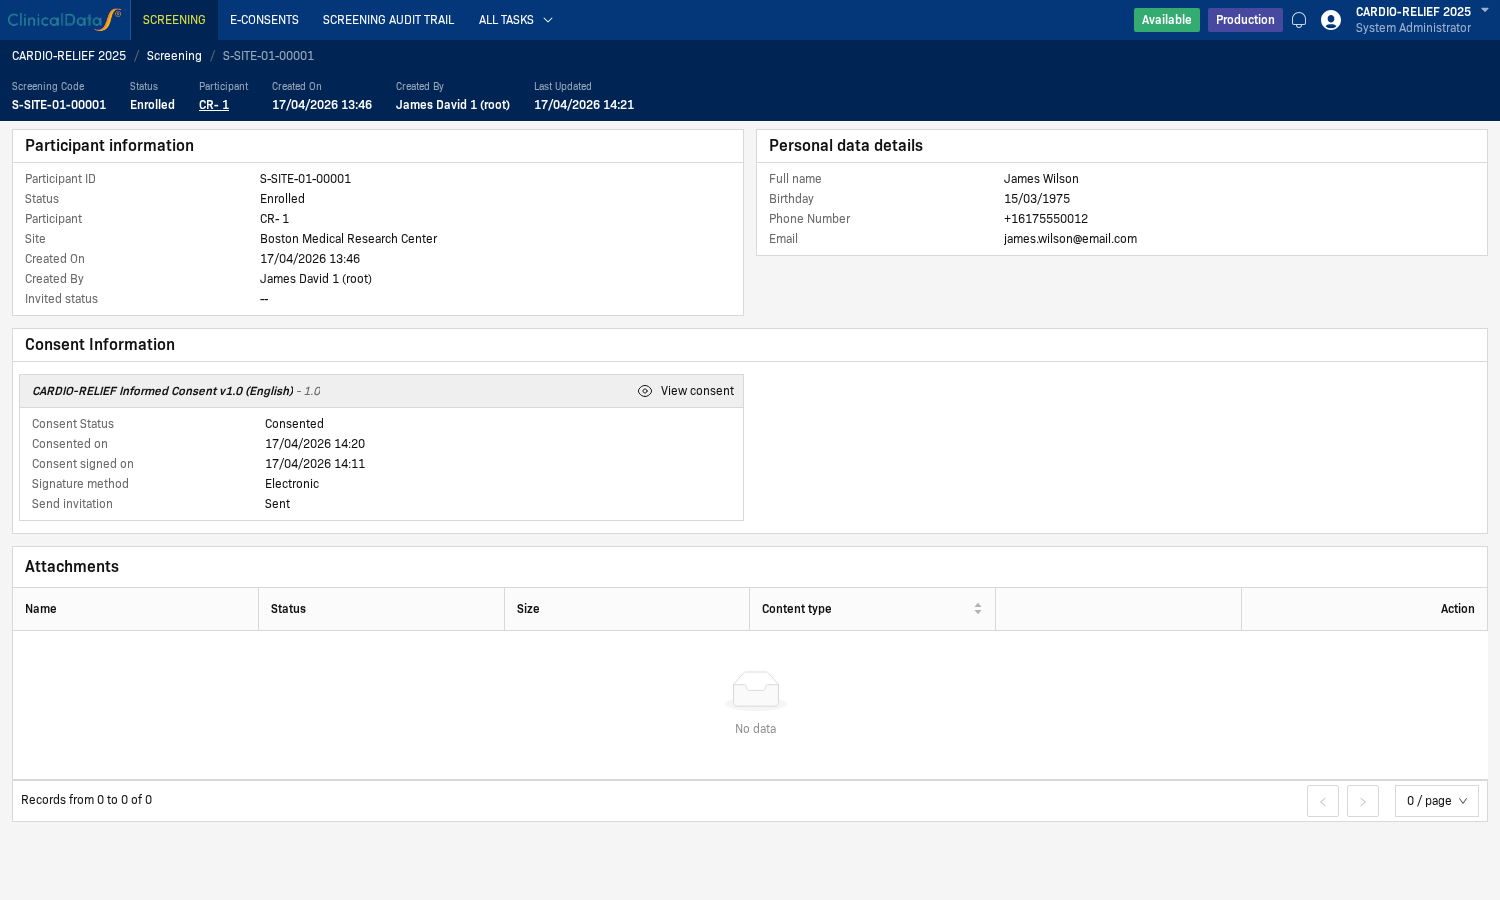
After successful signing, return to the Participant record to confirm:
- Consent Status: Consented
- Consent signed on and Consented on have recorded timestamps
- Signature method displays Electronic
Important Notes
- If a participant does not have a signing invitation, you need to send an invitation first within the screening workflow.
- If a form is not in Published status, the participant will not be able to complete the e-Consent signing.
- For studies in read-only mode, you cannot make configuration changes directly on the e-Consent Setup tab.
Multi-Language Consent Forms
For global studies, the same ICF can be published in multiple languages.
Adding a New Language Version
- In Consent Forms, click Add Form
- Configure the new language version:
| Field | Description |
|---|---|
| Name | Same ICF name as the base version (e.g., "Main ICF") |
| Version | Same version number as the base form |
| Language | Select the target language (e.g., Vietnamese, French) |
| Country | Optional — restrict to specific country |
| Consent Method | Electronic |
- Upload the translated ICF content
- Set status to Published when ready
Managing Multi-Language Forms
| Action | Description |
|---|---|
| Add language | Create a new language variant of an existing form |
| Update all languages | When ICF content changes, update all language versions |
| Archive old versions | When re-consent is issued, archive all language variants of the old version |
Language-Aware Invitations
When sending an invitation, the system can:
- Auto-detect participant's preferred language from their profile
- Send the invitation email in the appropriate language
- Link to the correct language version of the consent form
Multi-Language Best Practices
- Publish the base language version first, then add translations
- Ensure all language versions have identical version numbers for the same ICF revision
- Test each language version in Design mode before publishing
- Archive all language variants together when issuing a re-consent
Re-Consent Configuration
Re-consent is required when the ICF content changes due to protocol amendments or new safety information.
Enabling Re-Consent
- Publish the new ICF version (all required languages)
- Archive the previous ICF version (all languages)
- In Auto invite, enable Auto-invite for re-consent if participants should be automatically notified
- The system flags all previously consented participants as requiring re-consent
Re-Consent Settings
| Setting | Options | Description |
|---|---|---|
| Re-consent required | Yes / No | Whether existing participants must re-consent |
| Auto-invite for re-consent | Yes / No | Automatically send new invitations to previously consented participants |
| Re-consent deadline | Date | Optional deadline for re-consent completion |
| Grace period | Days | Days after deadline before participant is flagged as non-compliant |
Re-Consent Flow
- Admin publishes new ICF version → old version auto-archived
- Participants with old consent are flagged
- New invitations are sent (auto or manual)
- Participants sign new version
- Both old and new consent records are retained in audit trail