Returns (Randomization mode)
A return records the transfer of unused, expired, damaged, or excess investigational product (IP) from a site back to the sponsor or a central warehouse. In Randomization-mode studies, the study has exactly one investigational product, and tracking is fixed to By Unique Serial Number — the return is a list of the individual serial numbers being sent back.
Navigate: IMP → Transfer → Returns
Who can act at each stage
| Stage transition | Action | Button | Roles |
|---|---|---|---|
| Create / edit Draft | Create or edit a return | New Return / Save | Clinical Research Coordinator, Site Pharmacist, Study Administrator, System Administrator |
| Draft → Requested | Submit for review | Send Request | Clinical Research Coordinator, Site Pharmacist, Study Administrator, System Administrator |
| Requested → Approved | Approve | Approve | Study Administrator, Study Sponsor, System Administrator, Unblinded Supply Manager, Sponsor Supply Manager |
| Requested → Rejected | Reject | Reject | Study Administrator, Study Sponsor, System Administrator, Unblinded Supply Manager, Sponsor Supply Manager, Warehouse Manager |
| Approved → Preparing | Confirm goods are being assembled | Start preparing | Clinical Research Coordinator, Site Pharmacist, Study Administrator, System Administrator |
| Preparing → On Delivery | Confirm shipment has been dispatched | Ready to ship | Clinical Research Coordinator, Site Pharmacist, Study Administrator, System Administrator |
| On Delivery → Received / Quarantined | Confirm receipt at the destination | Receive | Study Administrator, System Administrator, Warehouse Manager |
| Draft only | Cancel the request | Delete (list action) | Study Administrator, System Administrator, Warehouse Manager |
| Received / Quarantined → Closed | Final verification | Verify all detail | Study Administrator, Study Sponsor, System Administrator, Unblinded Supply Manager, Unblinded Pharmacist, Sponsor Supply Manager |
Clinical Research Coordinator, Investigator, Site Monitor, Study Monitor, and several other roles have read-only access to the return list and detail pages at every stage.
Step 1 — Create a return (Draft)
-
Click + New Return.
-
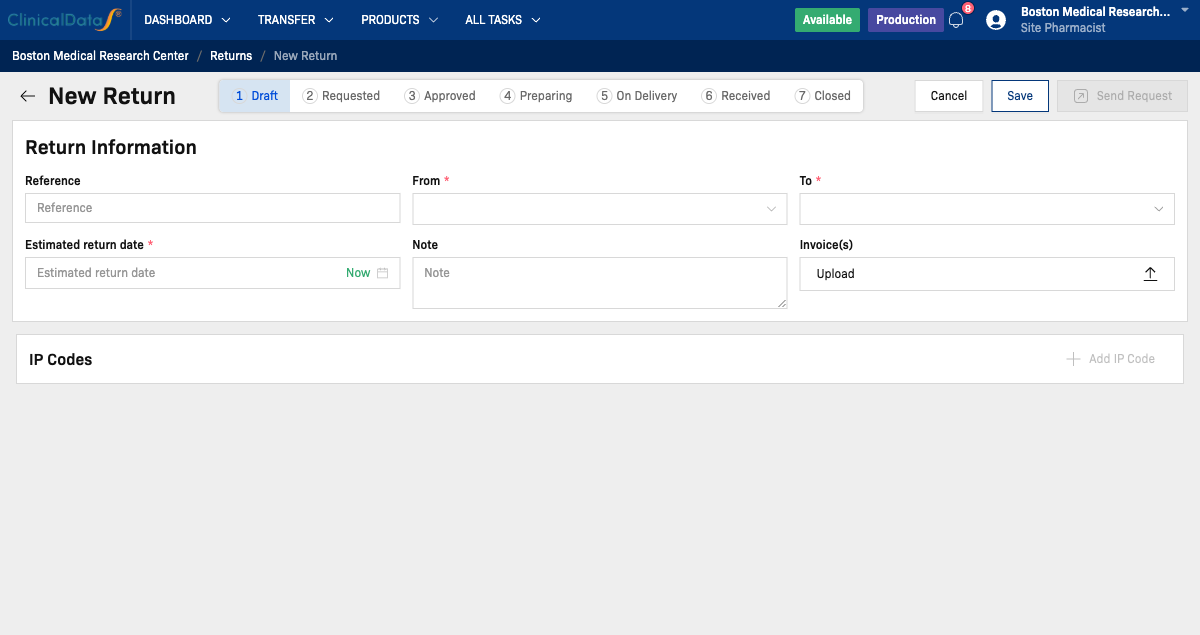
Fill in the Return Information fields:
Field Required Description Reference Optional Custom reference number. If left blank, the system generates one automatically From Required The site initiating the return To Required Destination — a warehouse or the central depot Estimated return date Required Expected date of dispatch Note Optional Reason for the return or any remarks Invoice(s) Optional Upload supporting documents -
In the IP Codes section, click + Add IP Code. This is disabled until a source site (From) is selected.
-
In the Add IP Code dialog, select the serial numbers to return. Only serial numbers that are currently Available at the source site and eligible for return are listed — a serial number already dispensed, already on a different in-progress return, or held elsewhere is not offered. Use the search box to filter by serial number, or Select all to check every listed serial number, then click Submit.
-
The selected serial numbers appear as a single product card showing the product name, unit, a running count in brackets (for example,
[3]), and the comma-separated list of serial numbers. Reopen + Add IP Code at any time before submitting to change the selection. -
Click Save to keep the return as Draft — it remains editable — or Send Request to submit it to the Sponsor. Submitting locks the return for editing until it is approved or rejected.
What this should show: the Draft return detail page for a Randomization-mode study, with the IP Codes product card expanded and its selected serial numbers visible.
Step 2 — Sponsor review (Requested)
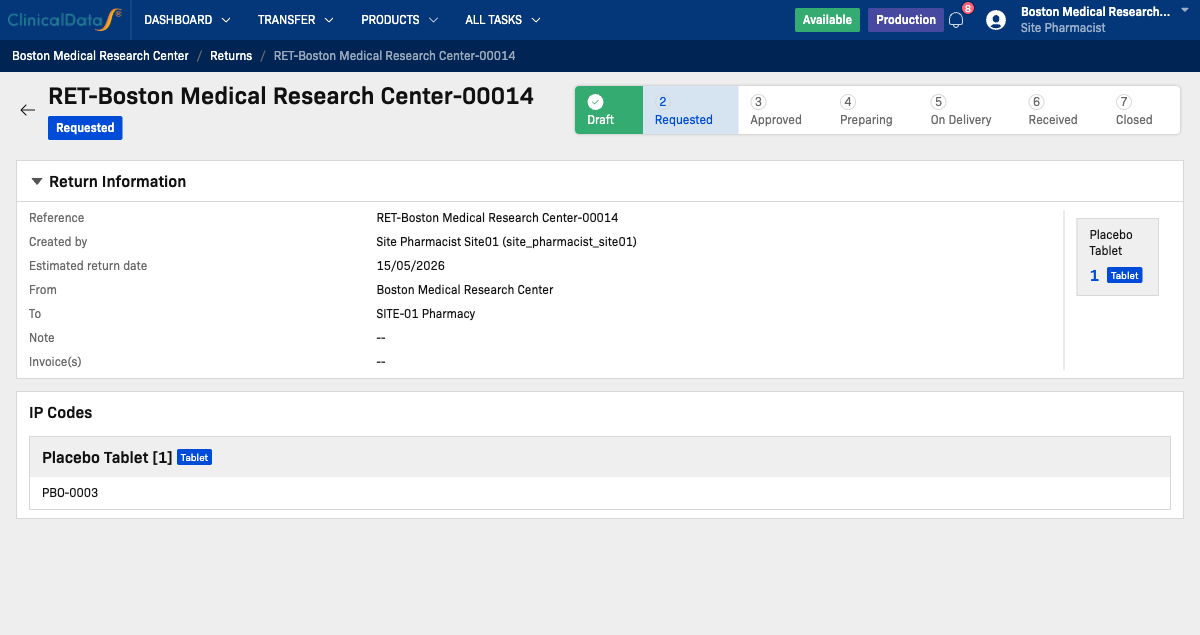
The Sponsor (or another approving role, see the table above) opens the return from IMP → Transfer → Returns and reviews the Return Information together with the selected serial numbers, shown as a per-product card.
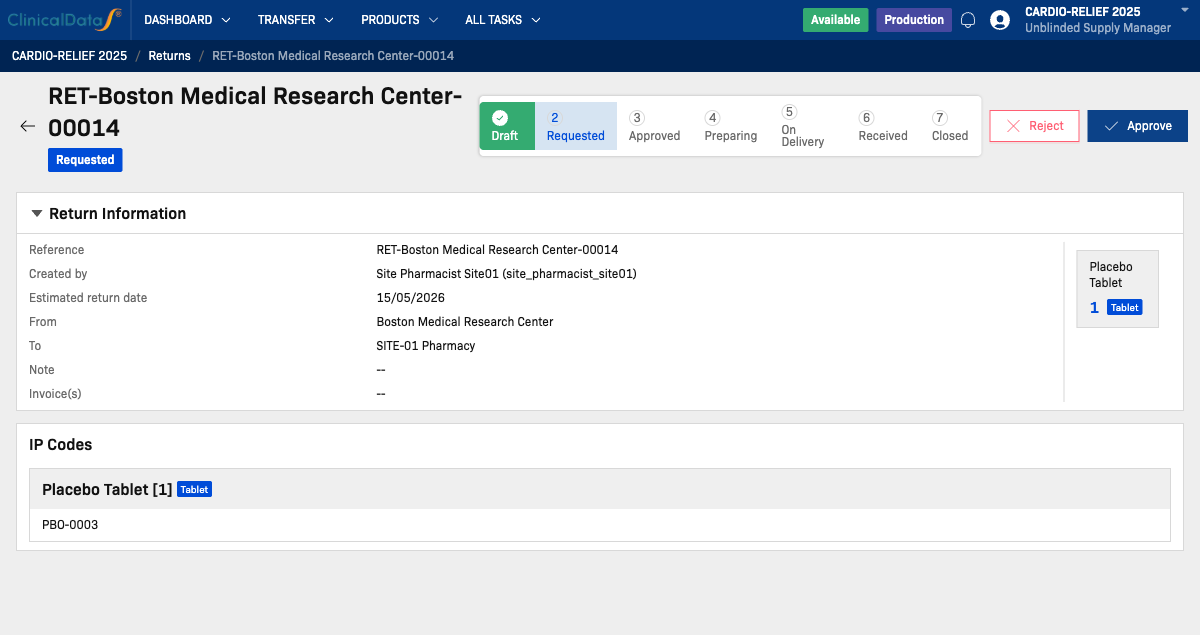
Click Approve or Reject. Both actions require entering a Comment by Admin, and the acting user's Username and Password to confirm the action.
- Approve → status changes to Approved.
- Reject → status changes to Rejected. The return remains visible with the Sponsor's comment recorded; it is not automatically reopened for editing.
The Sponsor can also create a return on the site's behalf using the same New Return form described in Step 1. A Sponsor-created return is created directly in Approved status.
Step 3 — Site prepares and dispatches (Approved → Preparing → On Delivery)
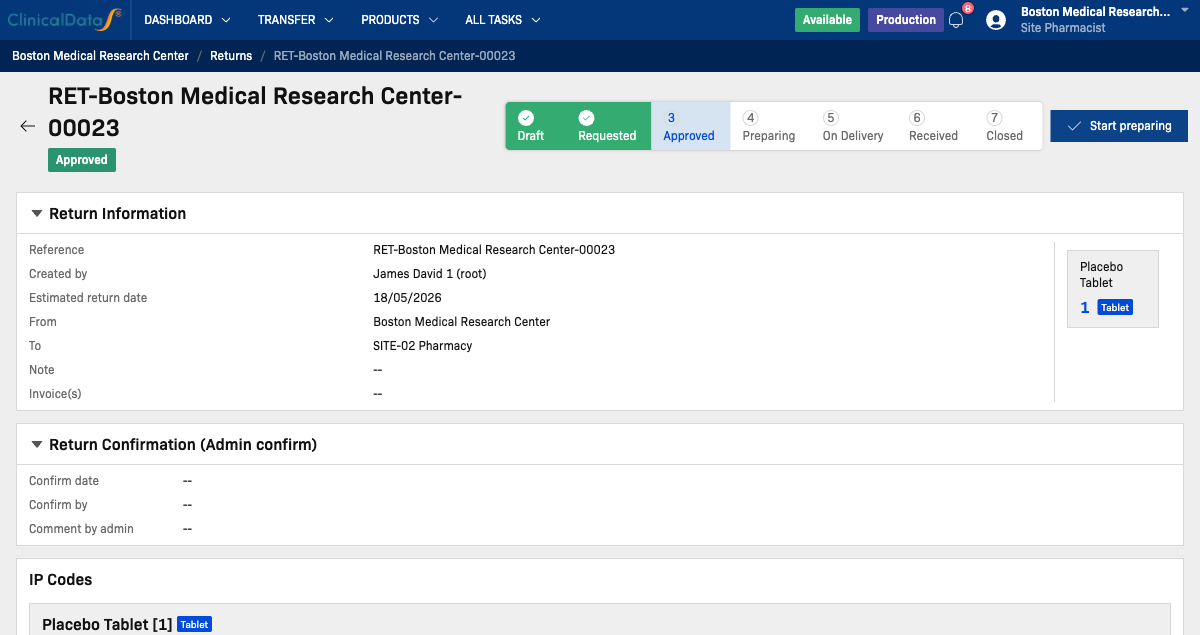
- Once the return is Approved, click Start preparing to confirm the serial numbers are being assembled for shipment. Status moves to Preparing.
- When the goods are packed and ready, click Ready to ship. In the confirmation dialog, enter the Shipping date and an optional Comment by site staff, then confirm with Username and Password. Status moves to On Delivery.
Each of these steps shows the Return Confirmation (Admin confirm) section (the approver's date, name, and comment) and the same per-product serial number card from Step 1.
Step 4 — Warehouse receives the shipment (On Delivery → Received / Quarantined)
Once the destination confirms physical receipt, click Receive. In the Return Confirmation (by Study Admin) dialog:
| Field | Description |
|---|---|
| Date received | Required |
| Comment by Warehouse | Optional |
| Shipping error | Yes / No |
If Shipping error is set to Yes, a checklist appears for the study's product: two side-by-side lists of the returned serial numbers, one for Omitted (not received) and one for Damaged. Check each serial number under the applicable list — a serial number can only be marked under one of the two. If no errors are reported, status moves to Received; if errors are reported, the return moves to Quarantined and requires follow-up before it can be closed.
Step 5 — Final verification (Closed)
On the return detail page, all three confirmation records are shown together — Return Confirmation (Admin confirm), (Site Staff confirm), and (Warehouse confirm) — each with its date, user, and comment, followed by the serial number card. If a shipping error was reported in Step 4, a Shipping Error panel appears below the card, listing the Omitted and Damaged serial numbers separately.
Click Verify all detail to confirm the physical count matches the system record and close the return. Status moves to Closed. This step applies whether the return arrived clean (Received) or was flagged (Quarantined) — Quarantined returns still require this final verification before they can be closed.
Returns can only be created for serial numbers that are available at the site. Serial numbers still in the Central Depot or a warehouse, or that have not yet had receipt confirmed at the site, cannot be returned through this workflow.
Related Docs
Studies using PSP mode instead: For PSP Study — Returns